Saturday, February 26, 2011

Chocolate Nests


I love making these super cute Chocolate Nests to give to family and friends at Easter time.

To make them you need
  • 1 packet of Chang's Crispy Fried Noodles (you get these from the supermarket in Australia)... I'm sure there are other brands of fried noodles you could use in UK or USA.
  • 200g chocolate, dark or milk
  • 2 tablespoons peanut butter
  • Sugar coated eggs, Cadbury's Mini Eggs look all pretty and pastel, or M&M eggs.


Instructions

  • Melt chocolate over water, or in the microwave

  • Stir in peanut butter and noodles
  • Put teaspoonfuls on trays lined with baking paper
  • Top with eggs
  • Refrigerate

The Best Nest

The boys each a bag and we headed outside on a bush walk to observe birds and to collect materials for their bird's nests. The boys collected, grass, soft paper, string, leaves, yarn, leaves, and thin twigs.


This activity provided such a wonderful opportunity for language development. The boys talked lots about why they chose certain materials e.g "This big piece of bark I'm putting in will protect the eggs from the wind and rain." "I chose these twigs because they look like the tree that a nest could be in, that way a vulture will think it is a normal tree, it's hibernating."


Rolling eggs with play dough is great for fine-motor skill development.


Making a Bird Nest


Materials Needed:


  • Brown Play dough, Clay or shredded string

  • Outdoor materials- collected by your child on your walk

  • Toothpick (to write their name and date underneath) if you use clay

  • bags

  • Play dough

Preschoolers are natural scientists. This morning I decided we would have a day learning about bird, nests and habitats. I gave the boys each a bag and we headed outside on a bush walk to observe birds and to collect materials for their bird's nests. The boys collected, grass, soft paper, string, leaves, yarn, leaves, and thin twigs.


Once back home I gave the boys some brown shredded paper string I had picked up from the discount store in the craft section (you could also use play dough or clay prepared the night before) The brown shredded string will represent the mud for this craft. I showed the boys how to shape the string into a bowl-like configuration. Next, they used their fists to push the center of the "nest" in, and gently pull the sides up. With a preschool craft, it is always best if each work of art is different so I went with the shape that they made for their nest! Then I had the boys use the outdoor materials they collected to stick into the string. Then the boys used some play dough to roll some eggs to put inside their nest. This was a wonderful activity rich in language development as well as science. The boys are so proud of their nests and will definitely take pride of place on our Easter shelf!


Thursday, February 24, 2011

Yummy Pancakes


Mix a pancake, stir a pancake,
Pop it in a pan.
Fry a pancake, toss a pancake,
Catch it if you can.


Do you celebrate Pancake Tuesday in your house? We definitely do, and each year our pancakes become bigger and the toppings more elaborate.Each year I read a couple of my favourite "Pancake" themed books to the boys before we get busy in the kitchen.

Mr. Wolf fancies some tasty pancakes, but he doesn't know how to make them and has trouble reading the Wolf It Down Recipe Book. Asking his neighbors is no use—Chicken Little, Wee Willy Winkle, the Gingerbread Man, Little Red Riding Hood, and the Three Little Pigs all nastily refuse. Poor Mr. Wolf has to work it out all by himself. I LOVE this book, along with the rest of
Jan Fearnley's and look forward to reading it to the boys on Pancake Tuesday each year. Here is our pancake recipe:

Ingredients
115g plain flour,
pinch of salt,
1 large egg (beaten),
1 tbsp melted butter or sunflower oil,
300ml milk,
butter or oil for frying

Method
1.Sift flour and salt into a bowl,make a well in the centre,add the egg and half the milk.
2.Beat the ingredients together,then whisk in the remaining milk along with the melted butter
or oil.
3.Heat a little oil in a frying pan, pour in enough batter to to evenly cover the base.
4.Cook for about 1 minute, toss the pancake over and cook the other side until golden.
5.Top with sugar and a squeeze of lemon juice.
6. You can try many different topping, maple syrup,chocolate and whipped cream or even try some
savoury ones too!

Get out all of the measuring spoons, cups, and materials you will need in advance, and then show your child how to measure the ingredients to make pancake batter. While measuring, make comparisons between one cup and 1/4 cup, or estimate how much a teaspoon is - and then measure it to see if you guessed correctly. Invite your child to feel, smell, and taste the individual ingredients -- like flour, salt, sugar, baking powder, etc. Examining the various colours and textures teaches useful science skills. Count and add as you put the appropriate number of tablespoons or cups in the batter. These activities develop the foundation necessary to learn more complex math skills

Don't just eat pancakes this year, try some of these fun Pancake Activities and Crafts
  • Give each member of the family a frypan/plastic plate and place a pancake on it. Set the microwave for one minute and see how many times each person can flip their pancake!
  • Set a frypan on the floor/on the grass and from a distance see how many of the five pancakes each family member can toss into the pan!
  • Download these free alphabet Pancakes Cards. Laminate and cut out and play some letter recognition games. www.sparklebox.co.uk/topic/fest/pancake/html
  • Pancake Finger Paint
    Put some plain pancake batter on a paper or plastic plate. Add a drop of red food coloring and let your child mix it into the batter with his/her fingers. Make fun designs in the batter. Add a drop of yellow food colour or blue food colour. What colour does the batter turn? This is a great way to introduce primary colors and how combining them makes other colours. Talk about how the batter feels - is it cold, squishy, smooth? Add some syrup to the mix and see if the texture changes - is it sticky? Don't forget to remind the kids that this batter is a science and art experiment - it's not for eating!
  • Fill a squirt bottle with some watered down pancake mix and let your child squirt some letter "P"s for Pancake on a large piece of paper. If your child's fine motor skills are still developing in the skill of using a squirt bottle, give them a paint brush and you could pre-write letter Ps and let them trace over.

If you think you can't have pancakes because you have allergies to dairy, think again! http://dairyfreecooking.about.com/od/pancakeswaffles/DairyFree_Pancakes_Crepes_Waffles_French_Toast_Recipes.htm


Crushed Egg Shell Art


I remember finding this book last year and just loved sharing it with the children I taught, and now with my own boys. For me, the real appeal of a Jan Brett book is her detailed illustrations. She draws the bunnies realistically, adding warm smiles on their faces. I always enjoy Jan Brett's books, especially her holiday stories. This story is perfect for little one's between 3-6 as it sends a good message - kindness. I love that she puts extra information in the small side pictures or in the scenes at the top of the pages, giving children a chance to see some action going on in the background or giving a preview of what's to come next. It's always fun to see how and where she has inserted her favourite animal (the hedgehog) into each of her books. The brilliant colours make her illustrations almost jump off the page - a nice contrast to her usual gentle story lines. I fell in love with this sweet bunny the first time I read through the book, as did my boys, and I'm sure you will too!


What you need:


12 coloured eggs
PVA glue
card stock
pencil

  • Colour dye a dozen eggs, even leaving a few white.


  • Let the eggs dry and then peel the shell. Make sure the shell is dry before you put it all into a zip lock bag and crush.


  • Draw an image on a piece of card using PVA Glue.


  • Sprinkle the crushed egg shell on the glue to create an egg-tastic picture.


Tuesday, February 22, 2011

Finger Paint Fun


Finger painting is fun for kids of all ages. These recipes are easy to make and require few materials. They will provide lots of art activities for your toddler.These recipes would work well for a play date or a rainy day activity. Finger painting is a wonderful way to enhance fine motor skills. You can also use finger painting activities to help teach concepts such as shapes, colours, or numbers.

Basic Finger Paint
This finger paint recipe is great for all ages, even young toddlers who still put things in their mouths. Mix together one cup flour and one and a half teaspoons of salt. Add one cup of water and mix together. Add your choice of food coloring. It will have a gritty texture.
Use this finger paint for just about any activity. It is great for little ones just to get the feel of the paint on their hands. Allow students to experiment with it and have them put their hand prints on the paper, or have them paint circles all over the paper.
Laundry Soap Finger Paint
This recipe is a fun one to use. It is probably better suited for older toddlers and preschoolers. Make sure children keep their hands away from their eyes. Pour laundry detergent into a small amount of water. Mix using an electric mixer or egg beater. It will have a thick consistency. Add any color tempera paint and mix well. This finger paint recipe is great to use on finger paint paper because of its thicker consistency.

Pudding Finger Paint
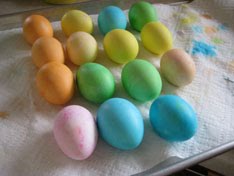
This is a fun option for all ages, even young toddlers. It is safe to eat. Make pudding according to package directions. If you want different colors, make vanilla and mix food coloring in.
Spoon the pudding out in bowls or pie tins and allow your students to create their pudding pictures. One fun activity to do with pudding paint is to have children paint their pictures on wax paper. While it is still wet, take a piece of Manila paper and press it on the wax paper.

Ready to Use Finger Paint
Shaving cream makes a wonderful finger paint for older toddlers and preschoolers. Just make sure no one ingests any. Simply squeeze out some shaving cream onto a table or desk top. Allow students to use their hands and create pictures with it. An added bonus to using shaving cream as finger paint is that it cleans the tables and desk tops.

Mix It Up
These mix in ideas are an excellent opportunity to teach about textures. For a rough texture, mix uncooked rice into your finger paint. For a smooth, slippery texture, mix in dish washing liquid soap. For a grainy texture, mix in coffee grounds. For a sticky texture, mix in corn syrup. The corn syrup will also have a super shiny finish when it dries.

Jelly Crystals
Place some jelly crystals into a container and mix it with some water. The mixture is around 1/3 water and 2/3 Jelly Crystals. But it’s really all up to you. This works well as a wash over a picture drawn with pastels first.

3 cups water, 1 cup cornstarch, food coloring
In a medium saucepan, bring water to a boil. Dissolve cornstarch in a separate bowl with water. Remove boiling water from heat and add cornstarch mixture. Return to heat, stirring constantly. Boil until the mixture is clear and thick (about 1 minute). Remove from heat.
As the mixture is cooling, divide into separate bowls and add food coloring. Let the children carefully mix in the coloring.

Salt and Flour Finger Paint
2 c. flour
2 tsp. salt
3 c. cold water
2 c. hot water
Food coloring
Add the salt to the flour in a saucepan. Pour in cold water gradually and beat the mixture with an egg beater until smooth. Add the hot water and boil the mixture until it becomes glossy. Beat it until it is smooth. Mix in food coloring.

Soap Powder Finger Paint Recipe with Talcum
Powder
1/2 Cup liquid starch
3 Cups water
1/4 Cup soap powder (not detergent)
1/4 Cup talcum powder
powdered paint
Mix soap and water in a saucepan, then add starch. Stir until soap powder is dissolved. Bring to a boil and cook until clear. Remove from heat and add paint and talcum. Using a mixer beat until it is smooth and foamy. Store air tight in refrigerator.

Rice Finger Paint Recipe
Mix baby rice cereal with water and food colouring or use cooked cereals with colouring.


Sweetened Condensed Milk Finger Paint
Sweetened condensed milk
Food coloring or brightly colored fruit juice
Pour a small amount of sweetened condensed milk into several small bowls. Mix in a few drops of food coloring in each bowl to create a variety of colors. Help your toddler use the coloured sweetened condensed milk to paint on newspaper, butcher paper, or craft paper.

Alternatives to Food Colouring
Some parents may prefer to avoid food coloring because their toddler is allergic to it or because they want to use more natural ingredients.
Red - cherry juice, raspberry juice, cranberry juice
Blue - blueberry juice
Yellow - dried turmeric
Health food stores may carry vegetable based food coloring.

Saturday, February 19, 2011

Lolly Cake


Lolly Cake in New Zealand is a national institution! A lolly cake or lolly log is a New Zealand cake which features "lollies" in the ingredients. It is fun to make and even better to eat! We had a 1st Birthday to go to today of a little New Zealand friend so the boys and I decided to take a plate along to share.


Ingredients
100 g butter, melted
250 g (1 packet) malt biscuits, crushed
1/2 tin (200g) sweetened condensed milk
180 g (1 packet) fruit puffs,
coconut
* If you live on the Sunshine Coast, Fruit Puffs available at Sunshine Food Wharehouse, 224 Nickilin Way, Warana.


Method
Mix together butter, biscuits, condensed milk and fruit puffs(cut into half pieces). Shape into a log and roll in coconut. Refrigerate until firm and then slice into rounds.

Wednesday, February 16, 2011

The Mixed-Up Chameleon


Eric Carle has a beautiful way of telling stories that touch the heart and teach valuable lessons and this story is no different. This is a great book that reinforces a strong message to children. I read this book every year in my classroom during the first week of school when I was teaching. It is a great book to use when focusing on the colours, as well as the story's value that lies in the message that everyone is unique and special. The kind of responses that your child will offer in response to this high-quality piece of literature will amaze you.

I used this book with Master 2 as he has a fascination with all animals. We came across a chameleon in another book recently and Master 2 has since been looking everywhere, in the garden, under the bed, out the window as we drive! lol

I gave Master 2 a template of a Chameleon after we read the book. I put out some coloured paints and gave Master 2 cotton buds to paint with - great for his fine motor skill development.

After he finished painting his chameleon he added some glitter. I think it looks very cute and he's very proud.