Wednesday, September 29, 2010

Brother's Are for Making Mud Pies


Can you remember making mud pies and daisy chains , rolling down grassy hills , drawing with
sticks in the dirt , creating fairy perfumes from flowers and building bush cubbies? These are some of the experiences we had as children that connected us with the natural environment. While they may not be part of our conscious thought as adults, they are significant nonetheless in shaping who we are and our values about the natural environment. Direct experiences with the natural environment are important for sensory development. These experiences cannot be described verbally or portrayed by images in picture storybooks or on television and computer screens; they must be explored up close and personal!


How to aid Sensory development in your child:


Though sensory development is natural process in kids, you can certainly make the entire procedure fast by helping him in coming out of the complex hurdles in the way. But before that you yourself need to understand few things.


  • Do not over burden your kid with knowledge at an initiating point. This will do nothing but irritate your kid.

  • Try to help him where he feels hindered otherwise let him explore the world on his own.

  • Do not be overprotective about your kid. Draw a line between being caring and over caring.

  • Let him go out of the way to explore the world. Do not safeguard him so much that you start limiting his desires and capabilities.

  • Try to understand the world from a kid's point of view before you start telling all complex things together. It's not a kid who will become mature to understand you, remember you will have to become a kid to understand him.

As educators we have an active and significant role to play ensuring children experience connections with the natural environment in meaningful ways — ways that will assist their understanding of connectedness both with and in the natural environment, and ultimately, promote action for sustainability. So when you are looking at Childcare/Daycare/Kinders for your child be sure to ask how they provide these learning experiences for the children in their care.

One of my favourite childhood memories comes from making mud pies in the backyard with my brother. So today Master 4 and Master 2 put on their boots and got out in the mud and made some mud pies! Wow what fun did they have, and even better the language that I heard coming from the two was great. As a bedtime favourite "The Little Yellow Digger" both boys know this story inside out and back the front, so it was wonderful to hear them chatting away and using the language they have picked up from our story time. A couple of muffin tins, spoons, bucket and diggers provided the stage for an hour long outdoor play session that provide them with so many valuable skills. All of which was easily packed up with a warm bath and LOTS of soap!!!


Tuesday, September 28, 2010

Ways To Share Books with Babies and Toddlers


•Make Sharing Books Part Of Every Day -Read or share stories at bedtime or on the bus.

•Have Fun -Children can learn from you that books are fun, which is an important ingredient in learning to read.

•A Few Minutes is OK—Don’t Worry if You Don’t Finish the Story.Young children can only sit for a few minutes for a story, but as they grow, they will be able to sit longer.

•Talk or Sing About the Pictures -You do not have to read the words to tell a story.

•Let Children Turn the Pages -Babies need board books and help turning pages, but a three-year-old can do it alone. Remember, it’s OK to skip pages!


•Show Children the Cover Page - Explain what the story is about.

•Show Children the Words - Run your finger along the words as you read them, from left to right.

•Make the Story Come Alive - Create voices for the story characters and use your body to tell the story.

•Make It Personal - Talk about your own family, pets, or community when you are reading about others in a story.


•Ask Questions About the Story, and Let Children Ask Questions Too! Use the story to engage in conversation and to talk about familiar activities and objects.Let Children Tell the Story - Children as young as three years old can memorize a story, and many children love to be creative through storytelling.

Learning With Puzzles

We have been sick in our household for the last couple of days, so it was a perfect opportunity to bring out all our puzzles, get down on the floor and get busy. I find puzzles are an innovative way to learn certain skills, that are essential to toddlers before they enter school. The bright and attractive colours, and the uniquely shaped pieces, appeal to them, and are therefore useful and effective in ways that both, entertain and educate the little ones.

Puzzles help children learn to solve problems. By trying several ways to fit a puzzle piece in place, requires abstract thinking: the ability to see a space and envision what belongs there.Their fine motor skills are sharpened by manipulating the pieces and fitting them in their proper space. Putting together a puzzle helps children actively practice important skills such as inference, deductive reasoning, and the notion that whole objects are generally made up of parts.

Having puzzles for varied skill levels permits children at all stages of development to experience success.The home should have puzzles that vary in complexity, five-piece puzzles, as well as 12-piece puzzles, and puzzles made of different materials. You should also find puzzles that interlock and those that have individual slots for pieces (for example, a five-piece puzzle of five individual animals).

Babies and toddlers can learn a lot from the right kind of puzzle. Shape stackers are a good type of puzzle for babies because the pieces are easy for small hands to grasp.The wooden puzzles that have a board with pictures of the corresponding pieces allow a toddler to learn how to match objects. The pieces fit loosely, so they're not too hard for them. Another benefit of toddler puzzles is that they can help teach the names of colours and shapes. You can help by pointing out the colors or shapes of the pieces that your child is matching. Some puzzles have pieces with letters, numbers or animals on them, and you can use those in the same way.

Puzzles for preschoolers may be a little more advanced. Jigsaw puzzles with a few large pieces are good for this age group. They are still developing fine motor skills and hand-eye coordination, so they are probably not ready for puzzles with small pieces yet.At this age children can benefit tremendously from working together to solve puzzles. They might share strategies such as sorting pieces by color or searching for patterns.This aids in social development and communication skills as well as intellectual development.


Monday, September 27, 2010

Teaching About Shapes


When I'm teaching Pre-schoolers about shapes I like to use the book The Shape Of Things by Dayle Ann Dodds. The shapes are big and colourful, and a lovely way to subtly introduce the children's ears to alliteration.


Teaching Shapes to Preschoolers can be so much fun! Below are some fun activities that will begin to help your young children recognise simple shapes.


  • Snack Shapes - Cut bread into shapes and ask them to eat the shapes. You can create a mix of squares and triangles and ask your child to eat the squares first. Not only he or she will eat a lot of bread in this way, but will also learn to differentiate between a square and a triangle. For an added variation, cut cheese into shapes as well to make shape sandwiches.

  • Shape BINGO -Use the printable BINGO cards below to play a friendly game of Shape BINGO with your preschooler. They will have fun, and learn at the same time.
    Preschoolers only need to know about the basic shapes, such as squares, circles, triangles, etc. They will learn the more complex shapes in the later years of their education.


  • SHAPE RUBBINGS - Try one or both of these ideas with your group.
    On cardboard, draw shapes such as circles, squares, triangles, and rectangles. Squeeze glue from a bottle over the shape outlines and allow it to dry. Then let your children place pieces of paper on top of the shapes and color over them with the sides of crayons to make rubbings of the glue outlines.
    Cut familiar shapes out of cardboard and attach them to a tabletop with double-sided tape. Have the children place their papers on top of the shapes and rub over them with crayons.

  • COOPERATIVE SHAPE COLLAGES - Draw a familiar shape, such as a circle, in the middle of a piece of butcher paper. Invite your children to look through magazines and tear or cut out pictures of circular shaped items. Then have them glue the pictures onto the butcher paper around the circle in the center. Let the children make collages for other familiar shapes to display together on a wall or a bulletin board.
  • CREATING WITH SHAPES - From several colors of poster board, cut out assorted sizes of circles, squares, triangles, and rectangles. Store the shapes in a box or a zipper-top bag. Let your children take turns arranging the shapes on a tabletop or on the floor any way they wish to create pictures.

  • TRACE AND MATCH SHAPE GAMES - Cut several familiar shapes out of cardboard to use for these games. Sit with your children in a circle and lay out the shapes in the middle. While the children close their eyes, trace around one of the shapes on a piece of paper. When the children open their eyes, have them guess which shape matches the traced one. Continue with the remaining shapes.
    Using a marker, trace around each shape on a large piece of poster board. Let the children try matching the shapes by placing them on top of the tracings.

  • SHAPE LACING CARDS - Cut familiar shapes out of cardboard and punch holes around the edges. On each shape, tie one end of a long piece of yarn through one of the holes. Wrap tape around the other end of the yarn to form a lacing needle. Set out the shapes and invite your children to lace the yarn in and out of the holes (activity requires supervision).

  • SHAPES, SHAPES, SHAPES Tune: “Three Blind Mice” Shapes, shapes, shapes; shapes, shapes, shapes.We love shapes, we love shapes.There’re squares and circles for me and you,Triangles, rectangles, ovals, too,Hearts and diamonds, to name a few.Yes, we love shapes.

  • PUZZLES - bring out any puzzles that have shapes in them. Puzzles provide a great opportunity to talk about the properties of each shape.


DIAMONDS


FIND A DIAMOND Tune: “Clementine”


Find a diamond, find a diamond,


Find a diamond on the floor.


Put your finger on the diamond,


On the diamond on the floor.


Find a diamond, find a diamond,


Find a diamond on the floor.


Put your two feet on the diamond,


On the diamond on the floor.


  • Bake diamond-shaped cookies for kites. Let your children decorate them with frosting and sprinkles and add licorice whips for kite strings.

  • Use masking tape to make a large diamond shape on the floor. Have the children try tossing beanbags inside the shape.

  • Show the children how to glue craft sticks onto paper in diamond shapes to make kites. Have them decorate their kites as desired and glue on pieces of string.


OVALS


WAVE YOUR OVAL IN THE AIR Tune: “If You’re Happy and You Know It”


Wave your oval in the air, in the air.


Wave your oval in the air, in the air.


Wave your oval in the air,


Then wave it here and there.


Wave your oval in the air, in the air.


Wave your oval at your toe, at your toe.


Wave your oval at your toe, at your toe.


Wave your oval at your toe,


Then wave it to and fro.


Wave your oval at your toe, at your toe.


  • Oval Ladybugs: Make thumbprints on light colored paper with red paint. When dry, use fine point markers to add spots, legs, and a head to each print.

  • Cut five ovals out of felt and use a marker to number them from 1 to 5. Set out a bowl containing 15 oval-shaped dried beans. Then, sitting with each of your children in turn, have them name the numerals on the ovals and place a matching number of beans on each one. (Note: Activities using small objects require close supervision.)

  • Have the children help make burritos with oval black beans.


CIRCLES


LET'S GO ROUND THE HULA-HOOP Tune: "London Bridge"


Let's go round the Hula-Hoop,


Hula-Hoop, Hula-Hoop.


Let's go round the Hula-Hoop,


Round the circle.


Round and round and round we go,


Round we go, round we go.


Round and round and round we go,


Round the circle.


  • Place a Hula-Hoop flat on the floor. Then invite your children to try such activities as these.
    Walk, crawl, or tiptoe around the hoop.Toss beanbags inside the hoop.

  • Pizza: Cut a large circle out of orange felt for a cheesy pizza. Cut out smaller red circles for pepperoni, black circles for olives, brown circles for sausage, and green rings for peppers.

  • Place folded paper towels in shallow containers and pour on tempera paint. Let your children make circle prints by pressing the ends of corks onto the paint, then onto paper. When the paint has dried, have the children use markers to turn their prints into pictures.


RECTANGLES


DO YOU KNOW THE RECTANGLE? Tune: "The Muffin Man"


Do you know the rectangle, (Hold up a rectangle.)


The rectangle, the rectangle?


Do you know the rectangle?


It has four sides like this. (Point to four sides.)


Two are long and two are short, (Point to long sides, then short sides.)


Two are short, two are short.


Two are long and two are short.


It has four sides like this. (Point to four sides.)


  • Have your children draw pictures on rectangular pieces of construction paper, encouraging them to fill up the space as much as possible. Then cut each child's paper into several rectangular puzzle pieces and challenge the child to put his or her puzzle back together.

  • Collect rectangular sponges and pour tempera paint into shallow containers. Invite your children to dip the sponges into the paint and press them onto a rectangular piece of butcher paper to make a print mural.


HEARTS


RED HEARTS, RED HEARTS Tune: "Twinkle, Twinkle, Little Star"


Red hearts, red hearts here and there,


Red hearts, red hearts everywhere.


All the hearts are here to say


Let's be special friends today.


Red hearts, red hearts here and there,


Red hearts, red hearts everywhere.


  • Bake heart-shaped cookies to decorate with frosting and sprinkles.

  • Make stencils by using a craft knife to cut heart-shaped holes out of cardboard squares. Tape the stencils on top of white paper and let your children sponge-paint over them to fill in the holes. When the paint has dried, remove the stencils to reveal the sponge-painted hearts.


TRIANGLES


TRIANGLES, TRIANGLES Tune: "Jingle Bells"


Triangles, triangles,


Triangles I see.


Count the points and count the sides,


Count them 1, 2, 3.


Triangles, triangles,


Just for you and me.


Count the points and count the sides,


Count them 1, 2, 3.


  • Ice Cream Cones: Glue brown triangle cone shapes onto paper. Add colorful paper circles for scoops of ice cream.

  • Let your children make collages using triangles cut from fabric scraps


SQUARES


I'M A SHAPE THAT HAS FOUR SIDES Tune: "Mary Had a Little Lamb"


I'm a shape that has four sides,


Has four sides, has four sides.


I'm a shape that has four sides,


And they are all the same.


Count my points, I have four too,


Have four too, have four too.


Count my points, I have four too.


And Square is my name.

  • Mosaics: Cut 1-inch squares out of bright coloured paper. Let the children glue the squares in designs on black paper.

  • Picture Frames: Show the children how to glue four jumbo craft sticks together to make a square frame. Have them decorate their frames with such items as stickers, beads, or seeds.

Drawing Them In

Before children begin making art with pencils, crayons, and the like, they are creating artwork: A swipe of pudding on the high chair, a pudgy hand raking the sand, a stick scraping through the dirt, it all says, "I can make something appear out of nowhere."


Drawing can be fun. It's sometimes silly how we have preconceived notions on what a good or a bad drawing is. I believe that children should be allowed to use art as a form of expression. But for kids who want to learn how to make specific figures already; you have to show them that drawing is made up of several parts joined together. “I don’t know how to draw!” is what you will often here from pre-schoolers, so I'm a big believer in that we as the teachers/parents/carers can change that statement....how you ask? I think all children and adults can draw, remembering that drawing is a person's perspective on how they see the world. Encourage children to draw what they see and see what THEY see! PRAISE PRAISE PRAISE! Each year that I teach I use drawing for many different purposes within the classroom setting: Quiet time, conflict resolution, grief therapy, fine motor skill practice, just to name a few. During this time I always sit and draw too, modelling this behaviour is so important for little ones, they see their teacher as someone who can draw = they see themselves as someone who can draw. As a child I wasn't encouraged to draw and was often told that I wasn't very good at it, although I enjoyed it. So for me drawing has become a daily part of my routine with my own children and they confidently see themselves as little people who can draw even at this young age. There are a few easy ways that you can show your pre-schooler to draw:


Younger children can start off by drawing stick figures. In the above drawings, you can draw a lollipop by adding lines or circles. I see a man running. But what about the second man? What is he doing? Why are his arms wide open? You can make lots of stick figures. You can draw girl stick figures too by adding clothes. Or you can draw stick figures with hair or make them raise their hands, bend their body and more.


You can use basic shapes like circle, triangle, square, rectangle to come up with simple drawings. The above illustration shows a Missy the Cat facing you and the other is Mister Rabbit with his back to you.
The Cat: Draw a circle. Add a smaller circle inside the big circle. Make sure the inside circle is placed near the bottom of the circle. Then you can add the ears, eyes, nose, whiskers and don't forget a tiny tail. Meow...Missy says "Be quiet. She wants to sleep."
The Rabbit: Draw a circle. Put inside a small circle near the bottom and part of a circle on top. Add the ears making sure it’s pointed and long with whiskers. You’ve got a rabbit about to hop away. Run after him!!!!


STAGES OF SCRIBBLES

Random Scribbles, 12 to 30 months

As soon as they learn to hold a pen and make marks on paper, kids are likely to experience "kinesthetic enjoyment," the pleasure of moving around and making marks. Their marks are typically random and disordered, made with the whole hand and arm, and are likely to extend off the paper. Or off the wall.


Controlled Scribbles, 30 months to 3 years
Now a child begins to use wrist motions, control her marks, make them smaller, and keep them mostly on the paper. Or on the wall.

Named Scribbles, 3 to 4 1/2 years
Kids start to hold crayons with their fingers rather than their fists, make a variety of lines and shapes, and tell you what they are. Kids are also apt to "narrate," announcing as they draw that, say, a squiggle is actually Aunt Kate dancing with Uncle Al. It's a step toward connecting pictures and things.

Preschematic, 4 1/2 to 7 years
Squiggles, circles, and spirals start to develop into symbols that represent things, as well as self-portraits. These new figures, resembling tadpoles and such, may not be in proportion or even strike you as actual objects, but kids are learning that their pictures say something to others, and to value their product.

Schematic, 7 to 9 years
Those symbols start to appear within a larger framework, or schema. Kids might now draw themselves and their family on a baseline, and include the sky. Their colours get more realistic, but still don't expect to be able to recognise who's Aunt Kate and who's Uncle Al.

Wednesday, September 22, 2010

Erupting Volcano


This would have to be one of the most enjoyable science experiments you can do with your kids!
Making a mock volcano is not a difficult task, but is very messy, because this volcano will actually erupt when mixing baking soda and vinegar together. Since this is a messy project, wearing old clothes is necessary as well as working on a pile of old newspapers. Working outside would be even better!

What do you need:
vinegar
baking soda
food coloring
2 litre empty plastic drink bottle
funnel
baking pan
sand
glue
dish (Cheap throw away ones are the best)
soap
warm water
Instructions:
  1. To make the volcano cone: Pour glue into the tray, making sure most of it is in the center. Glue the bottle in the center of the aluminum tray.

  2. Using your hands, cover the entire surface of the bottle with glue.

  3. Pour sand into the tray so your volcano looks like it’s on a beach. Be careful not to get sand inside the bottle.

  4. Use food coloring to make it look like it is on an island. You might want to add some water or glue to the sand, to make it stickier.

  5. When finished, let it dry for about an hour.

  6. To create lava: Add some red and yellow food coloring to your ½ cup of vinegar.

  7. Using a funnel, fill the bottle halfway through with warm water.

  8. Add a squirt or two of soap to your bottle.

  9. Slowly pour the vinegar into your cone.

  10. To make your volcano erupt: Place 2 teaspoons of baking soda onto a tissue.

  11. Twist up the tissue so it looks like a little pouch.

  12. Strap on your goggles to protect your eyes from the eruption.

  13. Drop the pouches into the volcano and watch it explode!

BLOW ME AWAY!


Children are fascinated by bubbles. Babies will watch them float and burst in the air, and older children love to blow and play with them.Soap suds aren't just for dishwashing! Blow away your family and friends with this cool science experiment.


What do you need:


  • dish soap

  • water

  • corn syrup

  • wire

  • string

  • straws

  • measuring cup

  • large bowl

DIRECTIONS
1. To make bubble solution: Take 1 cup for dish soap and add it to your mixing bowl. Add 3 cups of water, 1/2 cup of corn syrup and mix everything together.
2. Use a spool of wire or a hanger, and have an adult cut off about 8 inches for you. Take your piece of wire and make a loop with it at one end.
3. Twist your loop around six times to securely wrap the wire in place. Once your loop is in place you can form it into other shapes! Test it out.
4. Now, try making a bubble window. You'll need 2 straws and a long piece of string, about 12 inches long. Thread your string through both straws and then tie off the sting. Dip into bubble solution and try it out!
5. Now, take some of your bubble solution and put it on your cookie sheet. Dip your straw into the bubble solution and then hold it just above your cookie sheet. Blow into your straw until you have blown a bubble dome. Try to blow as many as you can!


The Tiger Who Came to Tea

We are fortunate enough to live on the Sunshine Coast in Queensland, Australia! Even better we live 10 minutes down the road from Australia Zoo so each year we buy a family pass and spend hour upon hour at the zoo. Considering the number of hours we spend there, the boys and I still manage to find new and exciting things to discover on each visit. Today was a special visit as Bindi was performing, and we spent lots of time looking at the Tigers after their feeding session. Our trip home was full of lots of exciting chatter from Master 2 and Master 4 about the Tigers, where they come from, what they eat, why they have stripes etc. Master 4 and I decided to look through our book shelf and find one of our favourite books, The Tiger Who Came For Tea.
It is about a little girl named Sophie who is having tea with her mother in their kitchen. Soon they are joined for tea by a tiger who drinks all the tea, eats all the food in the house and drinks everything, even draining the water from the taps, so that Sophie cannot have her bath. Then he leaves. Sophie's father comes home and suggests that they all go out and have a lovely meal in a cafe. The following day Sophie and her mother go out to buy some more food, including a big tin of tiger food. But the tiger never returns. Master 4 quickly decided that he would like to make a tiger using a paper plate!


You will need:
Large paper plate
Orange and black paint
Orange and black card or craft foam.
Black pipe cleaners
Glue
Thin elastic
Instructions:
Paint the back of the paper plate orange and leave to dry. Only when completely dry, paint on some black stripes - you'll need patience! (We baked Tiger Muffins in this time) For younger children you may want to pre-paint the orange paint. When the paint is dry cut out your eye holes. Twist together 3 pipe cleaners in the middle. Glue these to the centre of the mask.
Cut out a black nose from foam or card and glue this on top of the middle of the pipe cleaners.
Cut out 2 ears from orange foam or card. Glue these to the top of the face.
Make a small hole in either side of the face. Tie a piece of elastic through to hold your mask on.


The Zoo (A good poem to use with body movements and to begin discussions about animals)
At the zoo we saw a bear He had long, dark fuzzy hair (pretend to walk etc. like a bear)
We saw a lion in a cage. He was in an awful rage. (pretend to be an angry lion)
We saw the big, long-necked giraffe, And the silly monkeys made us laugh (everybody laugh)
But my favourite animal at the zoo Is the elephant-how about you?


While we were waiting for the orange paint to dry Master 4 and I made some cupcakes, which he happily decorated using icing pens to look like tigers!

Tuesday, September 21, 2010

Tips for Teaching Preschool Stranger Danger


Unfortunately the world is a scary place and there are people out there who prey on children.
No doubt, it is a very important issue that all parents must address – and one that requires ongoing, open communication with their children. The single most important thing to remember when teaching your children about stranger danger is to instill confidence, rather than fear. You want to equip your child with the knowledge and strategies they will need to protect themselves in dangerous situations. Also, keep your child’s age and maturity level in mind and base lessons upon that. Again, stranger danger lessons should be ongoing – adapt the conversation as your child grows as he/she is likely to encounter different types of situations.


The story Little Red Riding Hood story is an appropriate opportunity to address a safety issue that we altogether much rather not even think about or contemplate:child abduction; nonetheless it requires our attention to help our children avoid the unthinkable.

Teaching preschool stranger danger will help your child practice safety techniques if he is approached by a stranger. Child safety is more than telling your child "Don't talk to strangers." It includes practicing or role playing rules for staying safe. To begin, show your child a picture of who is a stranger and who is not a stranger.

A parent simply can't tell a child how to be safe. It takes practice. Discuss and role play these situations with your preschool-age child. Explain the consequences and dangers of talking to a stranger.

Teach your child these ten rules:

Grownups who need help should ask another grownup for help. This includes someone who asks for directions or wants to show you an animal.

You may talk to another person if I am with you or if I tell you it is ok. Otherwise, you should not tell someone you don't know your name or where you live.

Stay within my visual range when we are together in public. This is especially true if we are at the park or in a big store.

If we get separated in a store, ask a store person for help. Police officers or security guards will also help you find me.

Do not leave with someone you don't know. I will never ask a stranger to bring you to me.

If a grownup you don't know gets too close, back away or run for assistance. If this person threatens you, yell "I don't know you" so others know you do not know this person.

Do not take anything from a stranger, especially lollies, an animal, money or a ride in a car. If you feel scared, leave the area and find someone who will help you.

Know how and when to call 000. Trust the person who answers and answer the questions they ask you. They will help you. Teach your child their full name, address and telephone number.

Let your child know that there are NO SECRETS in your home only SURPRISES!

Make it a rule in your house that children never answer the door alone.


Preschool students should be taught stranger danger through role playing activities. These safety practices will teach your child how to respond if confronted with this type of situation.


Another great book for children aged from Kindergarten-Grade 2 is The familiar Berenstain Bear Family ( Learn About Strangers) may help to make a scary subject easier to bear. Brother discourages extrovert Sister from greeting every stranger she meets. Papa tells his children the rules for safe conduct among strangers. After Sister sees the headlines about missing cubs, she over-reacts, seeing every stranger as a threat. This is conveyed by a full-page spread: the top half shows reality, the bottom half shows Sister's scary version. Mama explains the concept of the bad apples in every barrel, literally. A funny looking apple is fine on the inside, but a perfect looking apple is bad on the inside. Finally, the attraction of a toy almost causes usually cautious Brother to go for a ride with a stranger. Sister isn't tattling when she tells her parents, she's just concerned for Brother's safety. The bears' rules are listed on the last page, including one about the privacy of a Bear's body, a topic not discussed in the text. A good book to start awareness in young children.

Super Sausage Rolls


Lately Master 2 requests that I sing his stories to him at bed time and one of his favourite is, There were 10 in the Bed. So today I planned some activities around that rhyme and we got busy, perfect as it was another rainy day! The boy's and I decided to make sausage rolls for lunch. I'm always looking for cooking activities that allow both Master 2 and Master 4 to be a part of. Home-made sausage rolls are a winner in our house, not just because of the fun we have making them, but they taste good too! I use a very basic recipe as that way both boys can really be part of the process.
Ingredients
1 large carrot, peeled, grated
1 small brown onion, finely chopped
beef mince
sausage meat
2 cups fresh breadcrumbs
puff pastry, thawed
1 egg
1/2 jar Baxter's tomato relish
1/2 cup soy sauce
sesame seeds, to garnish
tomato or BBQ sauce, to serve

Encouraging children to cook is great for creating healthy eating habits while improving self confidence and self esteem


While our yummy sausage rolls were cooking Master 2 and Master 4 enjoyed using some rollers I picked up from the discount store and did some painting.


There were ten in a bed
and the little one said
"Roll over, roll over"
So they all rolled over and one fell out.

There were nine in a bed
and the little one said
"Roll over, roll over"
So they all rolled over and one fell out.

There were eight in a bed
and the little one said
"Roll over, roll over"
So they all rolled over and one fell out.

There were seven in a bed
and the little one said
"Roll over, roll over"
So they all rolled over and one fell out.

There were six in a bed
and the little one said
"Roll over, roll over"
So they all rolled over and one fell out.

There were five in a bed
and the little one said
"Roll over, roll over"
So they all rolled over and one fell out.

There were four in a bed
and the little one said
"Roll over, roll over"
So they all rolled over and one fell out.
There were three in a bed
and the little one said
"Roll over, roll over"
So they all rolled over and one fell out.

There were two in a bed
and the little one said
"Roll over, roll over"
So they all rolled over and one fell out.

There was one in a bed
and the little one said"Goodnight".

Monday, September 20, 2010

The Bad-Tempered Ladybird


Today we managed to get out in the rain in our boots and umbrella's and go for a quick walk! (Before the down pour) On our walk Master 2 discovered a ladybird which he carefully held on his finger throughout our walk. No amount of convincing was going to get Master 2 to release the ladybird as he pointed out "NO, ladybird wet...spots wash off!" So we put out little ladybird into our bug catcher while we got busy reading The Bad-Tempered Ladybird and had a great afternoon doing all sorts of fun activities related to the ladybird. (Whilst Master 2 was asleep Master 4 and I let the ladybird go. When he woke from his nap we explained that the rain had stopped and she had flown back to the garden!)


Five Little Ladybugs
Five little ladybugs, climbing on some plants,
Eating the aphids, but not the ants!
The first one said: "Save some aphids for me!"
The second one said: "These are tasty as can be!"
The third one said: "Oh, they're almost gone!"
The fourth one said: "Then it's time to move on!
The fifth one said: "Come on, let's fly!"
So they opened their wings and flew through the sky.


Why not get all bugged up and make some fun ladybird snacks to eat!

- Strawberry/berry.chocolate bugs

- Apple/sultana bug

- Iced biscuits with choc drops


A CD seems to be the perfect shape for a ladybug.

Supplies needed :
CD
Felt
Chenille Stem
Wiggle Eyes
Pen
Craft Glue
Scissors
Trace around the CD onto red felt and cut out the circle. Glue the circle to the CD. Make a half-circle black head, a little smaller than half the CD, and glue it into place. Use a piece of the chenille stem to make a line down the ladybug's back. Cut small, black circle out of black felt and glue them onto the ladybug's back. Add wiggle eyes, and for extra detail, chenille stem antennae.

Ladybug Counting - Provide your child with a red circle. Have them draw as many black dots as they would like on one side. Count the dots on the paper and write the number on the other side.


Fingerprint Ladybug - provide your child with a piece of white paper and a red non-toxic stamp pads. Show the child how to make fingerprints on the paper, using only one finger at a time. When finished add wing outlines, dots, heat and antennae with a black pen, or for older children, have them add the features.


What you'll need:
3 small paper plates
Red and black paint
Red and black construction paper
Disposable foam paint brushes
Scissors
Googly eyes
Glue
Hole punch
Pipe cleaners

How to make your Paper Plate Ladybug:
Cut the center circle out of one of the paper plates.
Paint the circle black.
Paint the second paper plate (the whole plate) black.
Cut the third paper plate in half and then paint both halves red.
Glue the black circle to the underside of the black paper plate.
Glue the red halves to the black paper plate body so that they are split a little bit (so you can see some of the black body underneath them).
Dip the handle end of one of the paint brushes in black paint and use it to make the spots on the red ladybug wings.
Cut 6 thin strips of black construction paper that are all the same length. Accordion fold the strips and glue them onto the underside of the body, 3 on each side.
Use your hole punch (or if you don't have a hole punch have an adult poke two holes in the ladybug's head with scissors) to punch two holes in the ladybug's head near the body. Stick half of a pipe cleaner into each hole and twist very slightly at the bottom so they don't fall out.
Glue two googly eyes onto the head.
Cut a smile out of red construction paper and glue onto the head.

Saturday, September 18, 2010

The Importance of Teaching Children Routines


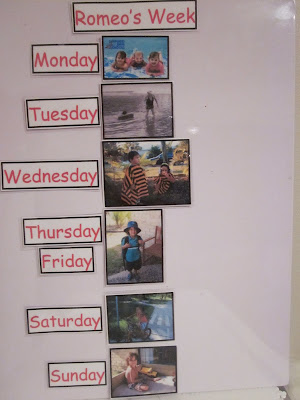
What is a routine? A routine is any activity that we do automatically on a daily basis.When children grow up without routines, duties and limits, they grow up in an uncontrolled manner and become difficult to manage.
I believe there are many benefits of Routines for Children
  • Increased performance at school
  • Sense of self-security
  • Ability to work in organised fashion
  • Ability to learn and keep healthy habits


Our biggest responsibility as parents is to provide a structured and nurturing environment in which our children can become prepared for life as an adult. It is critical that we stimulate our children's minds, social skills, emotions and bodies. Routines play an integral part in this stimulation, ensuring that children understand and embrace their duties and receive the nurturing and care that is so important to them.

I am a big advocate both as a mother, and a teacher that routines influence children’s emotional, cognitive, and social development. Predictable and consistent schedules in preschool classrooms help children feel secure and comfortable. Also, routines help children understand the expectations of the environment and reduce the frequency of behaviour problems, such as tantrums and acts of aggression.Consistent routines are an effective tool that parents can use to prepare their children for life, and to accomplish the stimulation and teaching that is so important to their development.


You could have a routine for:


Daily living...

Getting ready in the morning
Going to bed at night
Eating meals
Hygiene and health – for example, brushing teeth, washing hands
Using family resources like the computer and telephone
Pocket money, given at a regular time and day
Homework
Quiet time each evening
Hobbies
Sports/exercise

Household responsibilities...

Tidying up, looking after toys
Caring for pets
Looking after clothes and laundry
Chores – for example, setting the dinner table, packing away, unpacking the dishwasher
Shopping

Interacting and fun...

Greetings and goodbyes
Eating meals together
Regular play and talk times with a parent each day
Taking turns in talking with family members about their day
Special one-on-one time with a parent
Special weekly meals (such as pancakes on Sunday night or cooked breakfast Saturday morning)
Family days (family activity)
Family DVD nights
Family meetings
Annual events
Story time (book reading)

Social, religious and cultural...

Regular ‘play dates’
Regular contact with your extended family and friends
National/state/local celebration days, annual fetes or outings
Saying prayers
Observing religious events

Getting into Routine

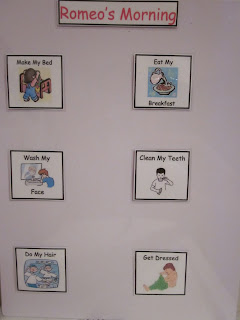
Getting out of the house on time with children dressed, teeth brushed, tummies filled and backpacks in hand can be challenging. Getting out the door without nagging, yelling and racing may seem impossible. You can create an environment that teaches your child to take responsibility for his/her morning routine. And, have more pleasant interactions with your child each morning. Doing so will help your child feel more successful and better about him/herself. And your relationship with your child will also likely benefit from a smoother morning routine.

Getting through the morning routine can become relatively stress free. A key is to allow the strategy described below to work. That is, the child is responsible for doing his/her morning tasks. If you take responsibility by reminding, doing for, helping (when help isn’t required) your child will likely let you keep reminding, doing and helping him/her. Such a pattern actually teaches your child he/she doesn’t have to keep track or do his/her morning routine on his/her own. This plan is about teaching your child to take care of his/her morning routine as independently as possible. Here is one way to make your mornings more manageable and enjoyable.

Decide what time you need to walk out the door to be to school on time.
Think about all the things your child needs to do from the time he/she awakes until it is time to walk out the door. Think carefully about how much time is needed to complete the tasks and ensure you and your child have enough time to get everything done. Make a list of the things that need to be done in the order they are to be completed. For young children drawings or pictures maybe helpful on the list and placed on a whiteboard where a marker pen is provided to tick of each task as it is completed.


Identify with your child a preferred activity he/she would enjoy doing after the rest of the list is completed when he/she has at least 5 minutes of time to spare before it is time to leave. This activity must be approved by you. Some ideas include: doind a puzzle, looking at some books, playing with the dog, playing with a toy etc. Hang the list in a location the child can monitor. Inform your child he/she is to do each task on the list and check them off as they are completed. As your child engages in and/or completes a task provide specific praise for doing so (e.g., good job getting dressed, your hair looks good). You may say things like “Just 2 more tasks and you get to play with your dolly.” “Wow, you are doing great, I bet you will have time for a puzzle this morning.” When your child gets everything done with time to spare, make sure he/she gets to do the fun thing. Be equally diligent in making sure he/she does not get to do the fun activity if everything is not done on time. Walk out the door on time! If your child only gets part of the list done, walk out the door on time! He/she may end up dressing in the car or going to Pre-school with messy hair. The key is not to give in to the temptation to nag or scold or do the task for the child. Rather, talk with his/her teachers and let them know you are working on improving your child’s independence and being responsible so he/she may come to school hungry or with messy hair a few mornings. Chances are this won’t happen very many times before the child figures out how to get through his/her routine successfully. It is easy to eat breakfast on the go and I wouldn’t encourage this if you want breakfast eaten at home. Otherwise, chances are, breakfast will continue to be eaten in the car.
Planning and patience are key. If you give this strategy a try and it doesn’t seem to be working, make sure enough time is allowed for everything to be done, praise is readily being given and access to the fun activity is available after everything else is done. And remember, change takes time.

Tuesday, September 14, 2010

Fun At the Beach


We are fortunate enough to live in a place that is surrounded by beautiful beaches, so needless to say that is where we spend most of our time. Our days at the beach seem to provide so many incidental learning opportunities for the boys - collecting and sorting shells, making pictures with shells, building sandcastles and sculptures, writing numbers and letters in the sand, identifying and classifying sea life in the rock pools, then list is endless. Below are some fun activities that can be done as a follow up from a day at the beach or a holiday away at the beach.


After a long walk along the beach collecting shells, Master 4 and I took the opportunity to make some sea creatures from his find together.


Today after our visit to the beach the boys and I read Mr Seahorse by Eric Carle. Below are some activities you can do as a fun follow up to the book.

  1. In a foil baking tray place a piece of white A4 paper.

  2. Place blobs of blue and green paint everywhere and put in 5 marbles. Using a rocking motion (like a seahorse I told Master 2) move the tray back and forth... back and forth to give a seaweed look.

  3. While the paint was drying I gave Master 2 an outline of a seahorse and some cut up tissue paper. He happily spread watered down PVA glue all over the seahorse and covered it in colours.

  4. When both the seahorse and paint were dry we glued on an eye and glued Mr Seahorse onto the seaweed.


  1. In a small dish, mix one part of PVA glue to one part water and stir till evenly mixed in a white watery texture.

  2. Put small dobs of paint of various colours in your palette. Not too much as you want your paints to be fairly watery.

  3. Pour a little PVA glue mix into each of the sections. Mix well with the paint colour.

  4. Dip your paintbrush in the colour of your choice, touch it gently to the tissue paper, and let the colour bleed into the tissue. Keep going till you’ve covered the whole tissue paper square with a rainbow of colours.

  5. Set aside to dry.

  6. Using a marker, draw the outline of your own Mister Seahorse.

  7. Cut out your seahorse. Also cut out the little fin and spikes, a tiny dark circle for the pupil of the seahorse’s eye, and a slightly larger white circle for the white of the eye.

  8. Paste your seahorse onto another clean sheet of paper.

This is a little song I like to sing with the boys after we have been to the beach or visiting the rock pools.

The Creatures in the Sea (Tune of Wheels on The Bus)

The Sharks in the sea go chomp, chomp, chomp....all day long
The Seahorse in the sea rock back and forth, back and forth, back and forth....all day long
The Octopus in the sea go tickle, tickle, tickle...all day long (wriggle hands everywhere over body)
The Fish in the sea dart all around, all around, all around (move hand like fast swimming fish)
The Whales in the sea go spurt, spurt, spurt ...all day long (flick fingers from top of head like blow hole)
The Crabs in the sea walk side to side, side to side,side to side...all day long (walk on hands sideways like a crab)
The Lobster in the sea go snap, snap, snap...all day long (hold hands up and make snapping action)
* You can make up lots more to go with this song and create your own actions/movements


Wednesday, September 8, 2010

Grandparents' Day


We all know and recognise children thrive in an environment where they are nurtured and loved. They learn about the world around them when those close to them join in their play and exploration. Grandparents often are just the people to create such an environment. They have more time to spend, and they can enjoy children for who they are at the moment. This warm, non-demanding and ever-loving bond is treasured by children and offers many benefits to grandchildren. My two boys spend a day a week at their Grandparents, and are fortunate to have Grandparents from New Zealand who visit regularly and are a big part of their lives. I really believe whether grandparents live near or far, it is important to value their vital role in child development and respect their ability to sweeten our children's lives tremendously. Tapping into this wonderful resource will enrich each of your family member's life.The undemanding and loving bond grandparents offer is treasured by grandchildren and has a myriad of benefits to grandchildren. Free of the pressure of raising children, grandparents have the freedom to play without the parental worries. I love listening to the conversations that take place between my boy's and their Grandparents and have often wished I had a tape recorder on hand to record some of the intense, and yet humorous chats that take place. It makes me smile when my kids come back from spending time with their Grandparents and I hear them using words my own mum said to me when I was a child. Below are some entertaining conversations that have taken place between Grandchild and Grandparent that I'd like to share with you..

My grandson was visiting one day when he asked, "Nan, do you know how you and God are alike?" I mentally polished my halo while I asked, "No, how are we alike?" "You're both old," he replied.

I didn't know if my grandson has learned his colours yet, so I decided to test him. I would point out something and ask him what colour it was. He would tell me and always she was correct. But it was fun for me, so I continued. At last he headed for the door, saying sagely, "Nan, I think you should try to figure out some of these yourself."

A Nan was telling her little grandson what her own childhood was like: "We used to play outside near a pond. I had a swing made from a tire; it hung from a tree in our front yard. We rode our pony. We picked wild raspberries in the woods." The little boy was wide-eyed, taking this in. At last he said, "I sure wish I'd gotten to know you sooner!"


Grandpa and Thomas and the Green Umberella
There is plenty of adventure with Thomas and Grandpa when they spend a day at the beach. Pamela Allen has the knack for capturing that special bond between a grandparent and a grandchild through simple text and expressive illustrations. Below I have listed some activities you might like to do after reading the book.

  • Grandpa and Thomas have gone to the sea. Talk about the beach using all the senses: Who has been to the beach? What did you see? How does the sand feel? How does the water feel? What does seaweed feel like? How does it smell?
  • Look at the front cover. Ask the same questions: What is the book going to be about? Look at the illustrations of Thomas. What is he feeling/ Why? What is going to happen next?
  • Discuss with your child what Grandpa and Thomas do in the story to prevent themselves getting sunburnt. Also, what are the healthy & unhealthy foods in the book? What other foods could they have taken to the beach with them? Look at having a picnic at the beach.
  • Look at the shapes in the book. What can you find?
  • How far can you throw a stick? If it is to dangerous, throw beanbags. Measure informally.
  • Look at the separate pages. Count:
    How many shoes?
    How umbrellas ?
    How many seagulls?
    How many sticks?
    How many items of clothing?
    Look at the patterns in the book.
    How does the author depict ‘movement’?
    How long were Thomas and Grandpa at the beach for? How do you know?
    Do a sequence activity. What did the two do first, second, next, last etc.
  • Colours especially green; grass, tree frogs, smarties, plants, peas etc.
  • Make an umbrella picture.

Tuesday, September 7, 2010

A Child’s need for Love


The need to be loved is exceptionally strong in all human beings. From childhood to old age, humans want to be loved by those around them. Love connects people in the strongest of ways. It produces care and concern, without which no one would take the responsibility of looking after others. Love makes the difficulties of life bearable, and helps ease the struggles of life. The love given to a child is more important than any material goods the family can provide.Life cannot just run on cold and hard rules. The warmth of love is necessary to infuse spirit and joy in life. A home without love, however orderly and organised, has not fulfilled its true purpose. A family is not just a micro-organisation where the needs of members are met. This could be done by a state run facility. A family’s outstanding characteristic is that members love one another, and this emotion binds them together.Love or the lack of it has a profound effect on the lives of children. Their mental capabilities, their fluency of speech, their observations and deductions on life, are all affected by it.

Self-esteem also can be defined as feelings of capability combined with feelings of being loved. A child who is happy with an achievement but does not feel loved may eventually experience low self-esteem. Likewise, a child who feels loved but is hesitant about his or her own abilities can also end up with low self-esteem. Healthy self-esteem comes when the right balance is reached.

Healthy self-esteem is a child's armor against the challenges of the world. Kids who feel good about themselves seem to have an easier time handling conflicts and resisting negative pressures. They tend to smile more readily and enjoy life. These kids are realistic and generally optimistic.In contrast, kids with low self-esteem can find challenges to be sources of major anxiety and frustration. Those who think poorly of themselves have a hard time finding solutions to problems. If given to self-critical thoughts such as "I'm no good" or "I can't do anything right," they may become passive, withdrawn, or depressed. Faced with a new challenge, their immediate response is "I can't." Here's how you can play an important role in promoting healthy self-esteem in your child.
  • Watch what you say. Kids are very sensitive to parents' words. Remember to praise your child not only for a job well done, but also for effort. But be truthful. For example, if your child doesn't make the soccer team, avoid saying something like, "Well, next time you'll work harder and make it." Instead, try "Well, you didn't make the team, but I'm really proud of the effort you put into it." Reward effort and completion instead of outcome.

  • Be a positive role model. If you're excessively harsh on yourself, pessimistic, or unrealistic about your abilities and limitations, your child may eventually mirror you. Nurture your own self-esteem, and your child will have a great role model.
    Identify and redirect your child's inaccurate beliefs. It's important for parents to identify kids' irrational beliefs about themselves, whether they're about perfection, attractiveness, ability, or anything else. Helping kids set more accurate standards and be more realistic in evaluating themselves will help them have a healthy self-concept. Inaccurate perceptions of self can take root and become reality to kids. For example, a child who does very well in school but struggles with maths may say, "I can't do maths. I'm a useless." Not only is this a false generalisation, it's also a belief that will set the child up for failure. Encourage kids to see a situation in its true light. A helpful response might be: "You are a good student. You do great in school. Maths is just a subject that you need to spend more time on. We'll work on it together."

  • Be spontaneous and affectionate. Your love will go a long way to boost your child's self-esteem. Give hugs and tell kids you're proud of them. Pop a note in your child's lunchbox that reads, "I think you're terrific!" Give praise frequently and honestly, without overdoing it. Kids can tell whether something comes from the heart.
    Give positive, accurate feedback. Comments like "You always work yourself up into such a frenzy!" will make kids feel like they have no control over their outbursts. A better statement is, "You were really mad at your brother. But I appreciate that you didn't yell at him or hit him." This acknowledges a child's feelings, rewards the choice made, and encourages the child to make the right choice again next time.

  • Create a safe, loving home environment. Kids who don't feel safe or are abused at home will suffer immensely from low self-esteem. A child who is exposed to parents who fight and argue repeatedly may become depressed and withdrawn. Also watch for signs of abuse by others, problems in school, trouble with peers, and other factors that may affect kids' self-esteem. Deal with these issues sensitively but swiftly. And always remember to respect your kids.

  • Help kids become involved in constructive experiences. Activities that encourage cooperation rather than competition are especially helpful in fostering self-esteem. For example, mentoring programs in which an older child helps a younger one learn to read can do wonders for both kids.

Monday, September 6, 2010

Chikka Chikka 1 2 3


This is my absolute favourite book to use with children when looking closely at numbers.Here numbers take over an apple tree. Launching the appealingly absurd antics is a challenge framed in the familiar rhythm: "1 told 2/ and 2 told 3,/ `I'll race you to the top/ of the apple tree.' " As the subsequent numbers climb one by one with equal enthusiasm (after 20, the counting goes up by 10s), a worried zero (as indicated by a stray bead of perspiration) chants a refrain, "Chicka Chicka/ 1, 2, 3.../ Will there be a/ place for me?" The climbing comes to a halt when bumblebees arrive, ordering the numbers to vacate, which they do in reverse order ("90, 80,/ 70 fall,/ hit the ground/ in a free-for-all"). A fun twist involves a missing number and zero, who finally realises where he belongs and leaps atop the leaves, a move that scares off the bees and clears the way for the other numbers to return.I love how several embellishments offer additional whimsy (5 wears a top hat, 70 sports long hair); endpapers and jacket flaps brim with brightly-hued numbers. Cleverly calculated verse and visuals add up to numerical mayhem that will entertain as well as reinforce counting skills and digit identification. As an end to our celebration of Numeracy week master 4 wanted to make a "number tree." He used large numbers for visual recognition and added them to his tree.This has taken pride of place in his room!